Porthole
Resources
Learning materials and replacement parts
Instructional Videos
Learn how to get started with your Porthole
Getting Started
Get ready for your first infusion
Getting Started
Get ready for your first infusion
Pro Tips
- We highly recommend that users familiarize themselves with the Porthole and its components by testing the Porthole with water before first use.
- The gasket is intended to be removable, and may become dislodged when the Porthole is disassembled. This is ok!
- When reinserting gasket, ensure its protruding leg is seated inside the groove, wider side facing out. First, gently press down a few spots around the perimeter, then push any loose sections down- wards into the groove. Avoid stretching the gasket.
- Tighten first screw with hex key for snug fit.
- Firmly squeeze the glass panes while tightening the second screw for proper seal.
- Squeeze the Porthole around the entire perimeter (like a steering wheel) to ensure that the gasket is properly seated before final tightening.
- Do not overtighten center screw. The screws hold the glass panes in place but gasket compression should come from squeezing the glass panes, not from torquing the screw.
- There are three screens that come with the Porthole. For best flow, always use the coarsest one suitable for your application. For a clean pour, pre-sift small particle ingredients such as tea before arranging in the Porthole.
- Do not insert the stopper when infusing ingredients that expand in liquid, are carbonated, or that may ferment. Increased pressure inside the Porthole may lead to leaks.
- Observe sanitary practices to avoid food borne illness. Many ingredient combinations, espacially oil infusions, can present a breeding ground for bacteria.
Recipes
Now that you're all set up, let's make something delicious!
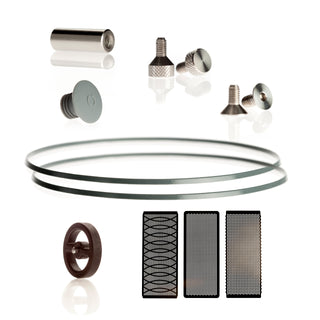
Replacement Parts
Keep your Porthole in tip-top shape!


